
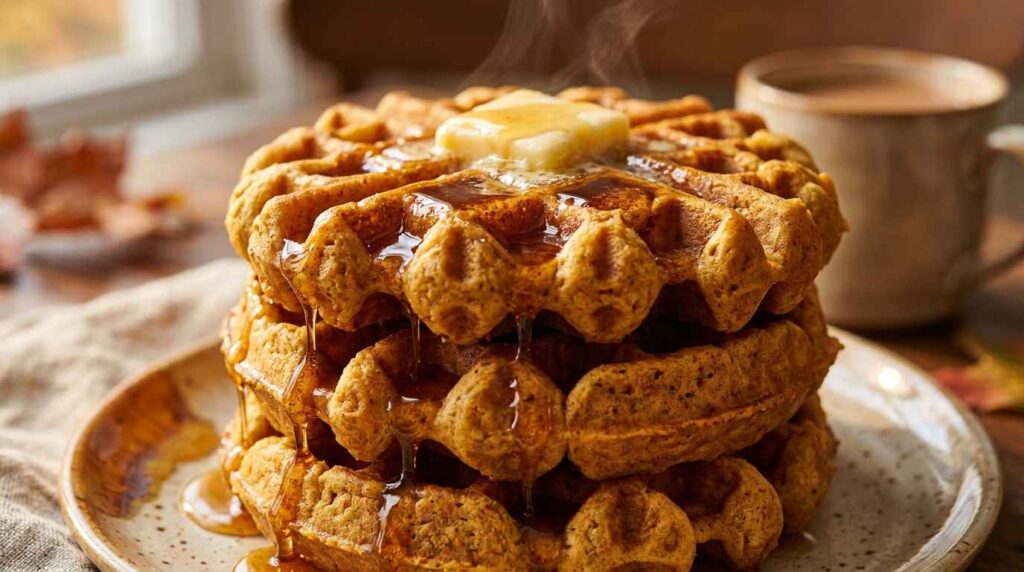
As soon as the leaves begin to turn and there is a chill in the air, the craving for warm, heavily spiced baked goods is undeniable. These Fluffy Homemade Pumpkin Waffles capture the essence of a crisp autumn morning. Packed with a full cup of real pumpkin puree and warming spices like cinnamon and nutmeg, they cook up with perfectly crispy, golden-brown edges and a tender, melt-in-your-mouth interior.
Unlike many homemade waffle recipes that end up dense or soggy, this batter utilizes a combination of baking powder, baking soda, and buttermilk to ensure maximum lift. Whether you are hosting a holiday brunch or simply treating your family on a lazy Sunday, the aroma that fills your kitchen while these are cooking will bring everyone running to the table.
Why You’ll Love This Recipe
- Incredible Texture: Crispy on the outside, light and airy on the inside. No heavy, gummy waffles here!
- Real Pumpkin Flavor: We use an entire cup of puree, which not only gives them a beautiful vibrant orange color but also ensures authentic flavor and moisture.
- Freezer-Friendly: Double the batch and freeze the leftovers. They pop right into the toaster for a quick weekday breakfast.
- Perfectly Spiced: A custom blend of cinnamon, nutmeg, and ginger perfectly complements the sweetness of the brown sugar.
Key Ingredients & Smart Swaps

- Pumpkin Puree: Make sure you buy 100% pure pumpkin puree, NOT pumpkin pie filling, which is pre-sweetened and spiced.
- Buttermilk: The acidity in buttermilk reacts with the baking soda to give these waffles their incredible fluffiness. If you don’t have any, mix 1.5 cups of whole milk with 1.5 tablespoons of white vinegar or lemon juice and let it sit for 5 minutes.
- Brown Sugar: The molasses in brown sugar adds a deep, rich sweetness that pairs beautifully with pumpkin.
- Melted Butter: Adding melted butter directly to the batter is the secret to getting those crispy, golden edges without deep-frying.
Step-by-Step Cooking Walkthrough
1. Dry Ingredients: Whisking the dry ingredients thoroughly ensures the baking powder and spices are evenly distributed, so you don’t end up with unevenly risen waffles or a sudden mouthful of pure cinnamon.
2. Wet Ingredients: Whisk the eggs and pumpkin together first, then add the buttermilk. Wait to add the melted butter!

3. The Folding Technique: Pour the wet into the dry, and mix gently. *Now* fold in the melted butter. Overmixing develops the gluten in the flour, which will make your waffles tough and chewy instead of light and crisp.
4. The Cooking Process: Let the waffle iron do its job. Don’t peek! Opening the lid too early will tear the waffle in half. Wait for the steam to stop billowing out before you check for doneness.
3 Chef Secrets for Perfect Results
1. The Oven Rack Trick: Never stack freshly cooked waffles on a plate—they will steam each other and get soggy! Instead, place them directly onto the wire rack of a 200°F oven to keep them warm and incredibly crispy while you finish cooking the rest.
2. Don’t Skip the Rest: Letting the mixed batter sit for exactly 5 minutes before cooking allows the flour to fully hydrate and the leavening agents to activate.
3. Extra Crispy Edges: If you want diner-style crispiness, swap 2 tablespoons of the all-purpose flour for cornstarch.
What to Serve With Pumpkin Waffles

- Toasted Pecans: The crunch of buttery toasted pecans is the ultimate textural contrast to the soft waffles.
- Real Maple Syrup: Throw out the imitation syrup. These deserve the real deal, preferably warmed up before pouring.
- Whipped Cream or Yogurt: A dollop of lightly sweetened whipped cream or Greek yogurt cuts through the richness beautifully.
Storage, Freezing & Reheating Instructions
- Refrigeration: Store leftover cooled waffles in an airtight container in the fridge for up to 3 days.
- Gentle Reheating: The absolute best way to reheat these is in the toaster! It brings back the crispy edges instantly. Alternatively, bake at 350°F for 5 minutes. Never microwave them unless you want a soggy mess.
- Freezing Guidelines: Let the waffles cool completely on a wire rack. Freeze them in a single layer on a baking sheet, then transfer to a freezer-safe zip-top bag for up to 3 months. Toast straight from frozen!
Ingredients
Equipment
Method
- Preheat your waffle iron according to the manufacturer’s instructions. If you have a temperature setting, medium-high usually works best for crisp edges.
- In a large mixing bowl, whisk together the flour, baking powder, baking soda, brown sugar, cinnamon, nutmeg, ginger, and salt until well combined.
- In a separate medium bowl, whisk the eggs, buttermilk, pumpkin puree, and vanilla extract until completely smooth.
- Pour the wet ingredients into the dry ingredients and gently fold them together using a spatula. When it is almost fully mixed, pour in the melted butter and fold just until incorporated. Do not overmix; a few lumps are perfectly fine!
- Spray the hot waffle iron lightly with non-stick cooking spray or brush with melted butter.
- Pour about 1/2 cup to 3/4 cup of batter (depending on your waffle iron size) into the center of the iron. Close the lid and cook for 3-5 minutes, or until golden brown and crisp.
- Carefully remove the waffle and place it directly onto the rack of a preheated 200°F oven to keep it warm and crispy while you cook the rest of the batter.
- Serve warm, topped with a generous pat of butter, toasted pecans, and a heavy drizzle of pure maple syrup.
Nutrition
Tried this recipe?
Let us know how it was!Frequently Asked Questions
Can I make this batter ahead of time?
You can mix the dry ingredients and wet ingredients separately the night before, but do not combine them until right before you are ready to cook. If mixed too early, the baking powder will lose its power and the waffles will be flat.
My waffles are sticking to the iron, what did I do wrong?
Make sure your iron is fully preheated before adding the batter. Also, ensure you have adequately greased the plates, and double-check that you added the melted butter *into* the batter.
Can I make these dairy-free?
Yes! Substitute the buttermilk with almond or oat milk (plus the vinegar trick), and use melted coconut oil or a dairy-free butter alternative in place of the regular butter.
Pin This Recipe for Later
Love this recipe? Save this pin to your Pinterest board so you have it ready whenever you need it!