
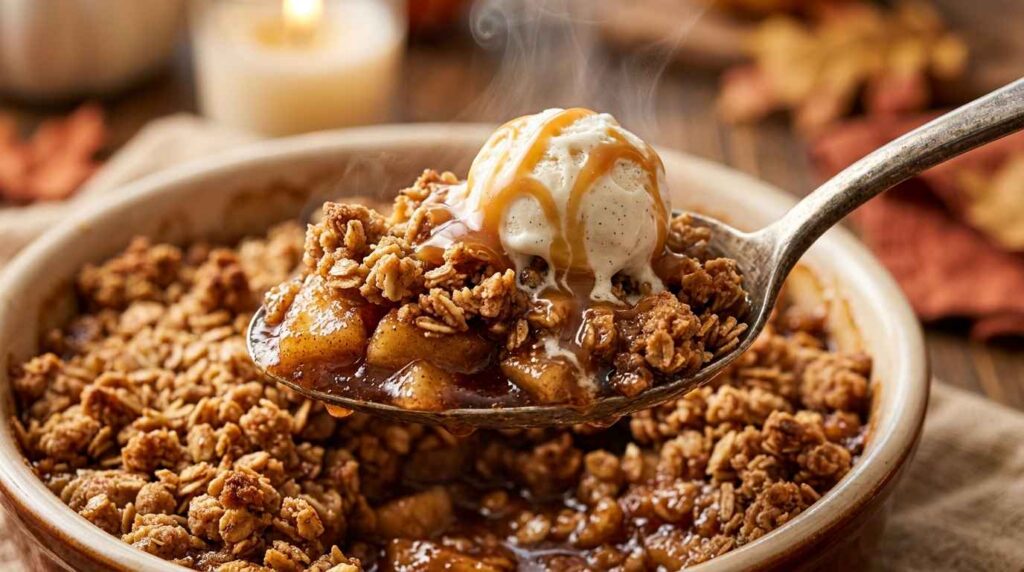
There is arguably no dessert more nostalgic or welcoming than a warm, bubbling apple crisp fresh out of the oven. As soon as the temperatures start to drop, this Easy Homemade Apple Crisp becomes a weekly staple. With tender, cinnamon-kissed apples buried underneath a towering layer of buttery, crunchy oat streusel, it delivers all the comforting flavor of a classic apple pie with only a fraction of the work.
The beauty of a crisp lies in its rustic simplicity. There is no fussing with pie crusts, chilling dough, or worrying about soggy bottoms. You simply toss fresh apples in spices, crumble a quick butter-and-oat topping over them, and bake until golden. The house will smell incredible, and when served hot with a melting scoop of vanilla bean ice cream, it is pure dessert perfection.
Why You’ll Love This Recipe
- Beginner-Friendly: Unlike pie, a crisp requires zero pastry skills. If you can slice an apple and crumble butter, you can master this.
- The Perfect Ratio: We double down on the streusel topping because, let’s be honest, the crunchy, buttery crust is everyone’s favorite part.
- Not Too Sweet: Using tart Granny Smith apples perfectly balances the sweet brown sugar topping.
- Feeds a Crowd: Baked in a 9×13 dish, this yields enough generous portions for holiday gatherings or weekend family dinners.
Key Ingredients & Smart Swaps

- Granny Smith Apples: Their firm texture holds up beautifully to baking without turning into mush, and their tartness cuts through the sugar. Honeycrisp or Braeburn are excellent substitutes.
- Old-Fashioned Rolled Oats: These provide the best chewy, rustic texture for the topping. Avoid quick oats, as they will get lost and turn muddy during baking.
- Cold Unsalted Butter: The butter MUST be cold! This is what creates those distinct, crunchy crumbles in the topping rather than a greasy sheet of dough.
- Fresh Lemon Juice: A quick toss in lemon juice prevents the apples from browning and adds a necessary pop of acidity.
Step-by-Step Cooking Walkthrough
1. Prep the Apples: Peel, core, and slice your apples evenly. Tossing them in sugar and cinnamon first ensures every single bite is perfectly sweetened and spiced.
2. Mix the Dry Topping: In a separate bowl, whisk together your flour, oats, brown sugar, cinnamon, and salt. Make sure there are no hard lumps of brown sugar left.

3. Cut in the Butter: This is the most crucial step! Use your fingers to literally squeeze and pinch the cold butter cubes into the dry ingredients until the mixture looks like wet sand with some larger pea-sized clumps.
4. Bake Until Bubbly: Spread the streusel heavily over the apples. You will know the crisp is done when the juices are actively bubbling up the sides of the dish and the top is a deep, gorgeous golden brown.
3 Chef Secrets for Perfect Results
1. Slice Uniformly: Try to slice your apples to roughly the same thickness (about 1/4 inch). If some are huge and others are paper-thin, they will bake unevenly.
2. Don’t Skimp on the Butter: If your topping looks powdery and isn’t forming crumbs, you might need an extra tablespoon or two of butter. The flour needs the fat to crisp up.
3. Let it Rest: It is incredibly tempting to dig in immediately, but letting the crisp cool for 15-20 minutes allows the bubbling fruit juices to set up and thicken into a syrupy glaze.
What to Serve With Apple Crisp

- Vanilla Ice Cream: This is non-negotiable! The contrast of the hot, spiced fruit against the cold, creamy vanilla is dessert heaven.
- Caramel Sauce: A drizzle of salted caramel over the ice cream elevates this into a restaurant-tier dessert.
- Whipped Cream: If you don’t have ice cream on hand, a dollop of freshly whipped heavy cream is a wonderful, lighter alternative.
Storage, Freezing & Reheating Instructions
- Refrigeration: Cover the cooled baking dish tightly with plastic wrap or foil. It will keep in the fridge for up to 4 days.
- Gentle Reheating: The microwave works for individual portions, but to restore the crunch to the topping, bake the whole dish at 350°F for 15 minutes.
- Freezing Guidelines: You can freeze the baked crisp for up to 3 months. Thaw overnight in the fridge and reheat in the oven until warmed through.
Ingredients
Equipment
Method
- Preheat your oven to 375°F (190°C). Lightly grease a 9×13-inch baking dish with butter or nonstick cooking spray.
- Prepare the filling: In a large mixing bowl, toss the peeled and sliced apples with the granulated sugar, lemon juice, and cinnamon until the apples are evenly coated.
- Spread the coated apples evenly into the bottom of the prepared baking dish.
- Prepare the topping: In a separate medium bowl, whisk together the rolled oats, flour, brown sugar, cinnamon, and salt.
- Cut the cold, cubed butter into the dry mixture. You can use a pastry blender, two forks, or your clean hands. Work the butter in until the mixture resembles coarse, pea-sized crumbs.
- Sprinkle the oat streusel topping evenly over the apples in the baking dish, covering them completely.
- Bake uncovered in the preheated oven for 40 to 45 minutes, or until the topping is deep golden brown and the apple juices are bubbling around the edges.
- Let the crisp cool for at least 15 minutes before serving so the juices can slightly thicken. Serve warm with vanilla ice cream!
Nutrition
Tried this recipe?
Let us know how it was!Frequently Asked Questions
Can I use a different type of fruit?
Absolutely! This exact streusel topping works beautifully over sliced peaches, mixed berries, or even pears. Just adjust the sugar depending on the sweetness of your fruit.
Why is my topping soggy?
A soggy topping usually means your butter was too warm when you mixed it in, or you covered the crisp while it was baking. Always bake it uncovered so the moisture can escape.
Can I make this gluten-free?
Yes, it is very easy to adapt. Simply swap the all-purpose flour in the topping for a 1:1 gluten-free baking blend, and ensure your oats are certified gluten-free.
Pin This Recipe for Later
Love this recipe? Save this pin to your Pinterest board so you have it ready whenever you need it!