
30-Minute Garlic Butter Steak Bites and Potatoes
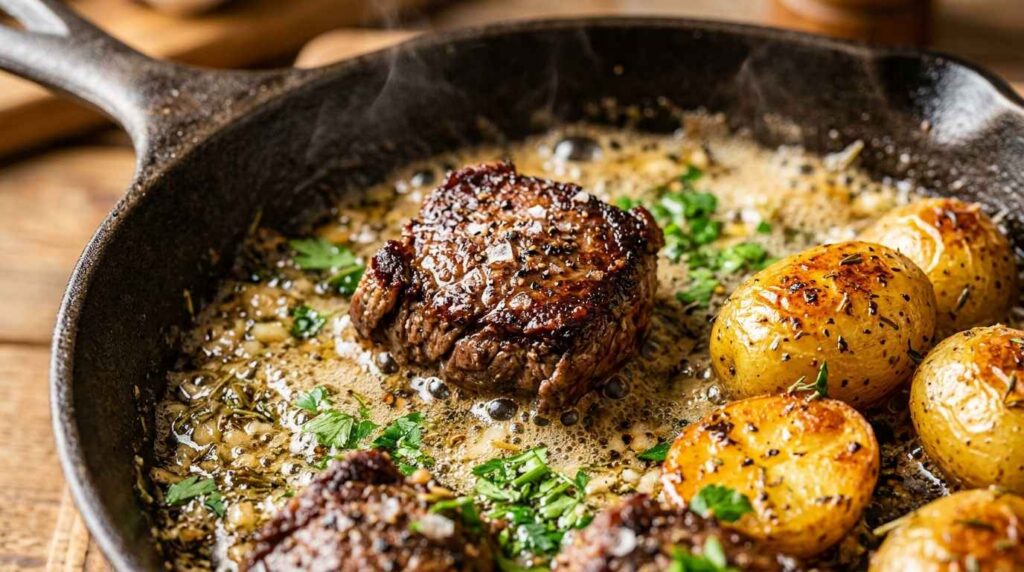
When the weather cools down and you crave ultimate comfort without spending hours in the kitchen, this 30-Minute Garlic Butter Steak Bites and Potatoes skillet is the answer. Tender, caramelized beef and crispy golden baby potatoes are tossed in a rich, foaming garlic herb butter that makes every bite melt in your mouth. The secret to perfect steak bites is a screaming hot cast-iron skillet. Getting a beautiful crust locks in the juices, while tossing them at the very end in a fragrant butter baste elevates the dish to restaurant quality. If you loved our Creamy Lemon Herb Chicken Skillet, you will be obsessed with how easy and flavorful this one-pan wonder is. Why You’ll Love This Recipe Speed: A completely from-scratch steakhouse dinner on the table in just 30 minutes. Cleanup: Everything cooks in one single cast-iron skillet. Less dishes, more relaxing! Dietary: Naturally gluten-free and packed with high-quality protein. Flavor: The rich combination of browned butter, fresh garlic, and thyme is absolutely irresistible. Key Ingredients & Smart Swaps Sirloin Steak: Cut into 1-inch cubes. You can also use tenderloin or ribeye for an even richer bite. Baby Yellow Potatoes: Halved for quick cooking. Yukon golds work perfectly as they get crispy outside and buttery inside. Olive Oil: Used for searing because it handles higher heat better than butter alone. Unsalted Butter: Added at the end to create a rich glaze without burning during the sear. Garlic: Fresh minced cloves provide that classic steakhouse aroma. Garlic Powder & Dried Thyme: A savory rub for the beef. Fresh Parsley: Adds a bright, fresh finish. Salt & Black Pepper: Crucial for seasoning both the potatoes and the meat. Step-by-Step Cooking Walkthrough 1. Prep the Potatoes: In a large cast-iron skillet, heat 1 tablespoon of olive oil and 1 tablespoon of butter over medium heat. Add the halved baby potatoes, season with half the salt and pepper, and cook for 10-12 minutes until golden and tender. Remove to a plate. 2. Season the Steak: Pat the steak cubes dry with paper towels. Toss with the remaining salt, pepper, garlic powder, and dried thyme until evenly coated. 3. Sear the Steak Bites: Increase heat to high and add the remaining olive oil to the skillet. Add the steak bites in a single layer. Sear without moving for 2 minutes to develop a deep golden crust, then flip and cook for 1-2 more minutes. 4. Garlic Butter Glaze: Reduce heat to medium. Add the remaining 3 tablespoons of butter and the minced garlic to the skillet. Cook for 1 minute until fragrant and foaming, basting the steak bites. 5. Combine & Serve: Return the golden potatoes to the skillet and toss everything in the rich garlic butter. Garnish with fresh parsley and serve immediately! 3 Chef Secrets for Perfect Results 1. Dry Your Meat: Always pat the steak cubes completely dry with paper towels before seasoning. Moisture is the enemy of a good sear. 2. Don’t Crowd the Pan: If your skillet is too small, sear the steak in two batches. Overcrowding will cause the meat to steam instead of sear. 3. Wait for the Butter: Add the butter at the very end. If you try to sear the steak in butter, the milk solids will burn and turn bitter. What to Serve With Garlic Butter Steak Bites Veggies: Steamed green beans, roasted asparagus, or a fresh garden salad balance the richness perfectly. Bread: A crusty garlic bread is essential for soaking up the leftover garlic butter sauce in the pan! Storage, Freezing & Reheating Instructions Refrigeration: Keep in an airtight container for up to 3 days in the fridge. Gentle Reheating: Reheat gently in a skillet over low heat until just warmed through to avoid overcooking the steak. Freezing Guidelines: Not recommended. Potatoes can become grainy when frozen and thawed, and steak bites may dry out upon reheating. Frequently Asked Questions What is the best cut of meat for steak bites?Sirloin is great for everyday dinners, but tenderloin (filet mignon) or New York strip will provide the most tender, melt-in-your-mouth results. Can I use russet potatoes instead?Yes, but they take longer to cook and don’t hold their shape as well. Baby yellow or red potatoes are best for skillet roasting. How do I prevent the garlic from burning?Add the garlic at the very end when the heat is reduced to medium, and only cook it for about 60 seconds until fragrant. Pin This Recipe for Later Love this recipe? Save this pin to your Pinterest board so you have it ready whenever you need it!
25-Minute Creamy Lemon Herb Chicken Skillet

There is something deeply comforting about a skillet meal that bursts with bright, zesty flavors. This Creamy Lemon Herb Chicken is a masterclass in balance: golden seared chicken breasts bathed in a velvety cream sauce infused with fresh rosemary, thyme, and vibrant lemon. The best part? It all comes together in just 25 minutes. Creating a luscious cream sauce doesn’t require hours of reduction. By deglazing the pan with a savory chicken broth, we lift the caramelized chicken fond straight into the sauce. The heavy cream adds luxurious thickness, while the fresh lemon juice cuts right through the richness, creating a light yet indulgent flavor profile. Why You’ll Love This Recipe Speed: A completely from-scratch gourmet dinner on the table in under 25 minutes. Cleanup: Only one skillet required, meaning less time washing dishes and more time enjoying your evening. Dietary: 100% wholesome, keto-friendly, low-carb, and made with zero alcohol. Flavor: The aromatic blend of fresh thyme and rosemary with creamy lemon sauce feels like a five-star restaurant dish. Key Ingredients & Smart Swaps Chicken Breasts: Boneless and skinless, pounded to an even thickness for a perfect golden sear. Fresh Lemon: Both the juice and the zest are used for maximum citrus impact. Heavy Cream: The foundation of the sauce. Avoid substituting with half-and-half as the lemon juice will cause it to curdle. Chicken Broth: Used to deglaze the pan safely and affordably, adding depth without any alcohol. Fresh Thyme & Rosemary: Fresh herbs are essential here; their aromatic oils release beautifully into the cream. Step-by-Step Cooking Walkthrough 1. Sear the Chicken: Season your chicken generously. Heat olive oil in a cast-iron skillet and sear the chicken until golden brown and cooked through. Transfer to a plate. 2. Deglaze & Aromatize: Lower the heat, add minced garlic, and sauté until fragrant. Pour in the chicken broth, scraping the bottom of the pan to release the flavorful fond. 3. Build the Cream Sauce: Whisk in the heavy cream, fresh lemon juice, zest, thyme, and rosemary. Let it simmer gently for a few minutes until it thickens slightly. 4. Combine & Serve: Return the chicken and any resting juices back to the skillet. Spoon the rich lemon herb sauce over the chicken and garnish with extra lemon slices. 3 Chef Secrets for Perfect Results 1. Room Temperature Cream: Always temper your heavy cream by letting it sit at room temperature for 15 minutes to prevent splitting. 2. Zest Before Juicing: It is nearly impossible to zest a lemon after it has been cut and squeezed. Always zest first! 3. Don’t Boil the Cream: A gentle simmer is all you need. Boiling heavy cream rapidly will cause the fats to separate, leaving a greasy sauce. What to Serve With Creamy Lemon Herb Chicken Starches: Angel hair pasta or wild rice are perfect for soaking up the bright, zesty sauce. Bread: A slice of warm focaccia or crusty baguette. Veggies: Roasted zucchini, steamed broccoli, or garlic butter green beans. Storage, Freezing & Reheating Instructions Refrigeration: Keep in an airtight container for up to 3 days in the fridge. Gentle Reheating: Reheat in a skillet on medium-low. The sauce will thicken in the fridge, so whisk in a tablespoon of broth to loosen it up. Freezing Guidelines: Not recommended. Freezing cream sauces often leads to a grainy, separated texture when thawed. Frequently Asked Questions Can I use half and half instead of heavy cream?It’s risky. Because this recipe contains acidic lemon juice, half-and-half is very likely to curdle. Heavy cream is stable enough to handle the acidity. Can I use dried herbs?Yes, but use one-third of the amount called for, as dried herbs are much more potent than fresh. Is this recipe gluten-free?Yes! The sauce thickens naturally by reduction, so there is no flour or roux required. Pin This Recipe for Later Love this recipe? Save this pin to your Pinterest board so you have it ready whenever you need it!
Easy Fresh Pico de Gallo Recipe Ready in Just 15 Minutes
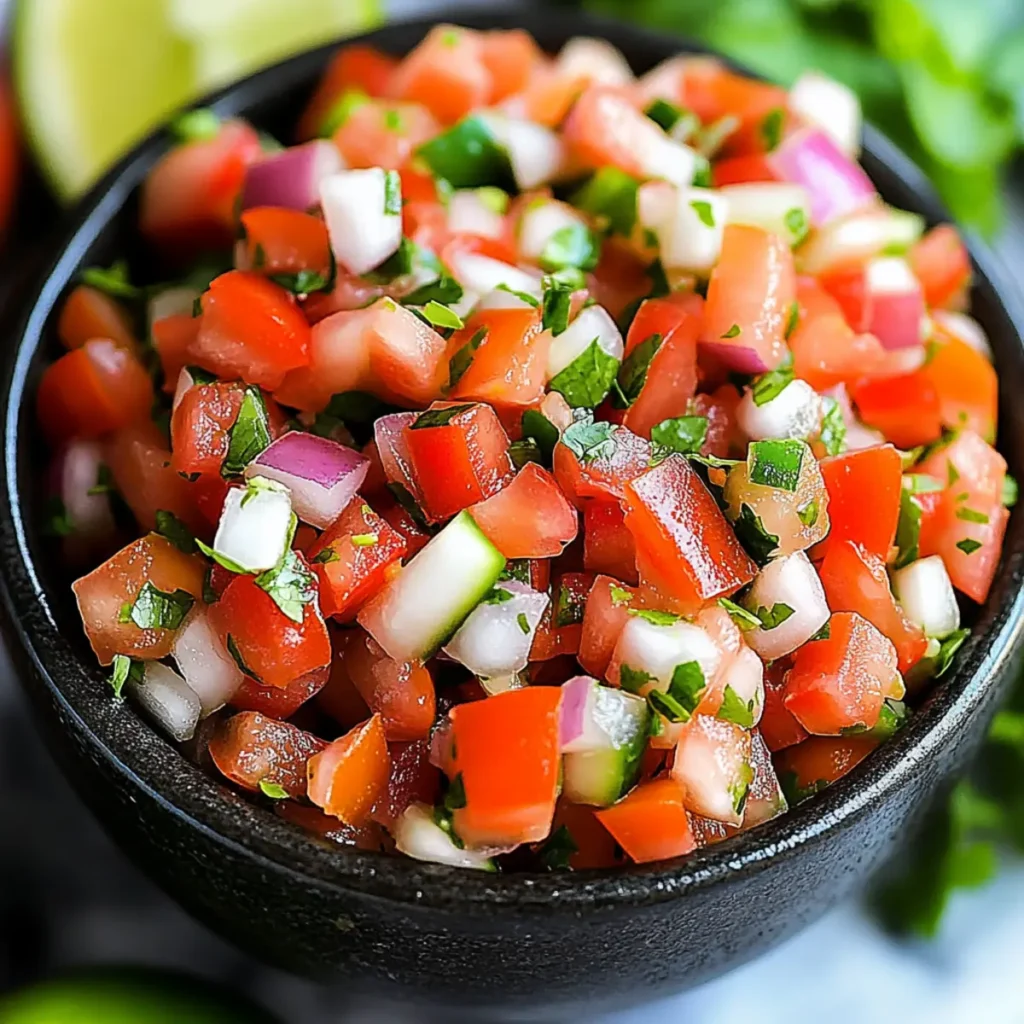
Fresh Pico de Gallo is an explosion of flavors that can instantly elevate your meals, whether it’s taco night or just a plain ol’ Tuesday. Imagine the bright, juicy burst of ripe tomatoes mingling with the crisp crunch of onions, the fragrant lift of freshly chopped cilantro, and a spicy kick from jalapeños—each spoonful is a fiesta in your mouth! For many of us, this vibrant salsa holds memories of backyard barbecues, sunny picnics, or maybe that one unforgettable summer road trip where you stumbled upon the world’s best taco truck. It’s the perfect union of fresh ingredients, and it’s ridiculously easy to whip up! Whenever I make Fresh Pico de Gallo, it takes me back to those perfect sunny days filled with laughter, and I can’t help but get excited knowing just how simple it is to recreate that experience at home. Ingredients for Fresh Pico de Gallo Here’s what you’ll need to make this delicious Fresh Pico de Gallo: 4 medium tomatoes – Choose ripe tomatoes for a sweet, juicy flavor; Roma or vine-ripened work best. 1 medium onion – A sweet onion adds a nice mild flavor; red onions also provide a lovely color. 1 bunch cilantro – Fresh cilantro is essential; avoid dried herbs for this recipe to get that bright taste. 1 medium jalapeño – For spice lovers, this pepper adds heat; remember to seed it if you prefer less kick. 1 medium lime – Fresh lime juice brings a zesty brightness and enhances the overall flavor profile. 1 teaspoon salt – A little salt helps to balance the flavors and bring out the best in your ingredients. How to Make Fresh Pico de Gallo Follow these simple steps to prepare this delicious Fresh Pico de Gallo: Step 1: Prep Your Produce Start by washing all your vegetables thoroughly. Dice the tomatoes into small pieces, ensuring to remove seeds to keep your pico fresher. Finely chop the onion and jalapeño, and chop the cilantro just enough to release its fragrant oils. Step 2: Mix It All Together In a large mixing bowl, combine the diced tomatoes, chopped onion, jalapeño, and cilantro. The colors should pop off the bowl like a summer garden! Step 3: Add the Zing Squeeze the juice of one medium lime over the top of your mixture. This adds a tangy flavor that is vital to the overall taste experience, so don’t skip this step! Step 4: Season with Salt Sprinkle in a teaspoon of salt. Adjust according to your taste, as fresh ingredients can vary in intensity. Mix all the ingredients thoroughly until beautifully combined. Step 5: Let It Rest Allow your Fresh Pico de Gallo to rest in the fridge for about 10–15 minutes. This helps the flavors meld together beautifully, creating that fresh, vibrant taste you recognize. Step 6: Serve and Enjoy After resting, give it another quick stir before serving. Pair it with tortilla chips, tacos, or serve it atop grilled chicken for an explosion of freshness that will impress anyone lucky enough to share a meal with you! There you have it! Making Fresh Pico de Gallo is so easy you’ll have this delightful salsa on your table in just about 15 minutes. It’s the perfect companion for virtually any dish, or even as a standalone snack that brightens up your day—trust me, once you try it, you won’t be able to get enough! Perfecting Fresh Pico de Gallo Cooking Process To craft the perfect Fresh Pico de Gallo, start by dicing your tomatoes and onions for an impressive blend of color and texture. Then, chop the jalapeño and cilantro before squeezing in fresh lime juice. Finally, mix everything together, ensuring even distribution of flavors in every bite. Add Your Touch to Fresh Pico de Gallo Feel free to customize your Fresh Pico de Gallo with different ingredients, such as swapping tomatoes for mango or adding corn for a sweet crunch. You can also adjust the heat by experimenting with different types of peppers or sprinkle in some garlic for a punch. Storing & Reheating Fresh Pico de Gallo Store your Fresh Pico de Gallo in an airtight container in the fridge for up to three days. If you need to reheat, use it cold as intended or gently warm it up, but be careful not to cook it, or you’ll lose that fresh flavor. The first time I made Fresh Pico de Gallo for my friends, they devoured every last bite and raved about how the flavors burst in their mouths. It instantly became a go-to dish for our gatherings. FAQs About Fresh Pico de Gallo What is Fresh Pico de Gallo? Fresh Pico de Gallo is a vibrant and fresh salsa made primarily from diced tomatoes, onions, cilantro, jalapeños, lime juice, and salt. Its bright flavors and crisp textures make it a staple in Mexican cuisine, perfect for adding a zesty touch to tacos, grilled meats, or chips. Unlike traditional salsas that are blended, Pico de Gallo is left chunky, allowing you to enjoy each ingredient’s unique burst of flavor. It’s quick to make, needing just about 15 minutes, and is a crowd-pleaser at any gathering. How can I customize my Fresh Pico de Gallo? The beauty of Fresh Pico de Gallo lies in its versatility! You can swap out ingredients based on your taste preferences. For instance, substitute diced tomatoes with diced mango for a tropical twist or toss in corn for added sweetness and crunch. If you prefer a spicier kick, try different peppers or add some minced garlic. Experimenting with various herbs, like mint or basil, can also lend a fresh twist. Tailor your Pico to match whatever dish you’re serving, and impress your guests with your creativity! How long can you store Fresh Pico de Gallo? Fresh Pico de Gallo can be stored in an airtight container in the refrigerator for up to three days. However, it’s best enjoyed fresh to savor the flavors and crunchy textures. Over time, the
Easy and Delicious Poppy Seed Dressing Recipe in Just 10 Minutes
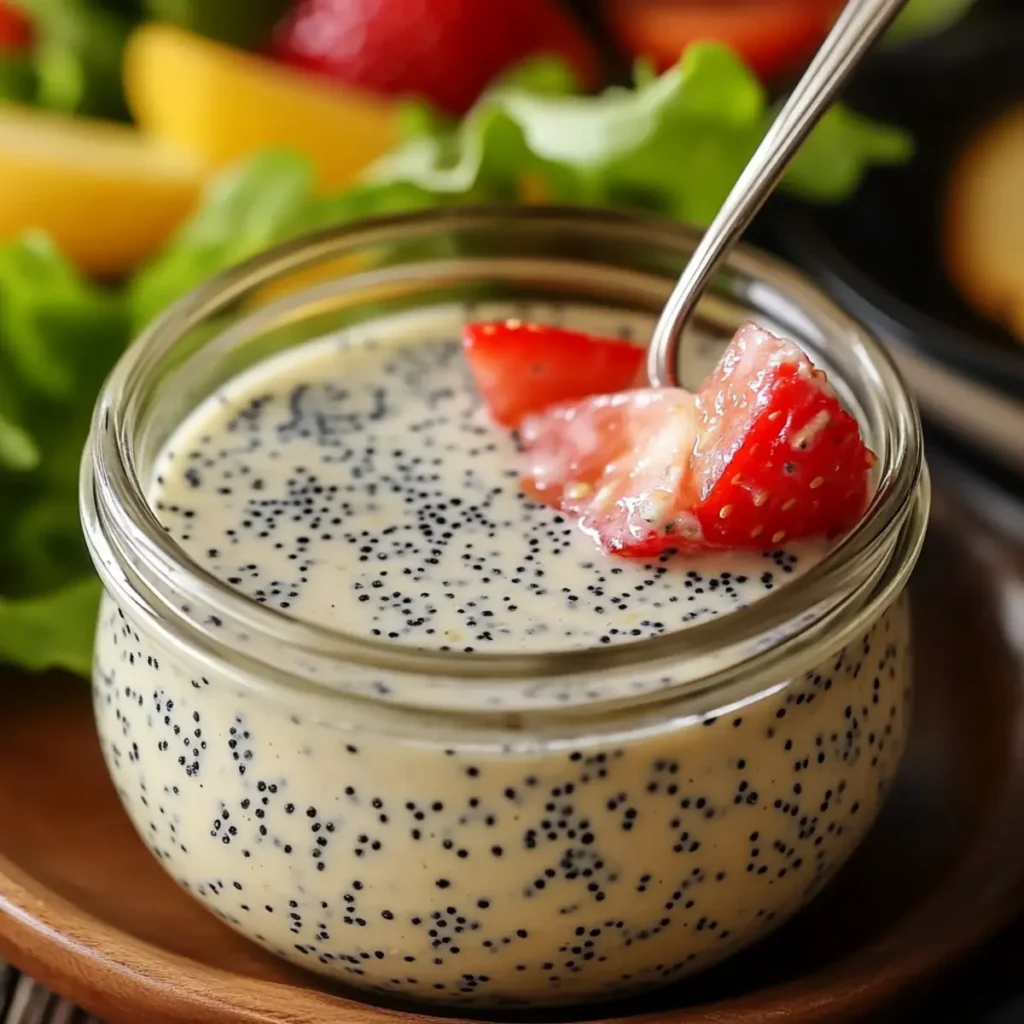
The vibrant blend of flavors in a luscious Poppy Seed Dressing can add a magical touch to any dish, drenching salads in sheer deliciousness and making your taste buds dance with glee. Imagine a thick and creamy concoction that teeters between tangy, sweet, and savory, all thanks to a glorious mix of mayonnaise and honey, harmonized by the nutty crunch of poppy seeds. This dressing is not just a condiment; it’s a celebration of flavors that invites you to enjoy a little joy with every drizzle. Whether you’re hosting a summer barbecue, revamping your lunch salads, or simply seeking a quick and easy way to elevate your dinner party, this Poppy Seed Dressing will become your go-to masterpiece. In just 10 delightful minutes, you will whip up a dressing that echoes memories of picnics and family gatherings, bringing a smile to your face and a burst of flavor to your plate. Ingredients for Poppy Seed Dressing Here’s what you’ll need to make this delicious Poppy Seed Dressing: 1 cup mayonnaise – The star base of our dressing, providing creaminess that clings pleasantly to greens and veggies. 1/4 cup apple cider vinegar – Adds the tangy brightness crucial for balancing the sweetness and thick richness in the dressing. 1/4 cup honey – Sweetens the dressing with a hint of floral notes, making every bite a little slice of heaven. 1 tablespoon poppy seeds – These tiny seeds add both visual appeal and a delightful crunch, making your dressing even more inviting. 1/2 teaspoon salt – Enhances all the flavors and rounds out the dressing beautifully. 1/4 teaspoon black pepper – A pinch of spice that lends depth without overpowering the dressing’s flavor profile. 1 tablespoon onion, finely chopped – Provides a subtle bite and adds complexity to the mix that dances on your palate. How to Make Poppy Seed Dressing Follow these simple steps to prepare this delicious Poppy Seed Dressing: Step 1: Gather Your Ingredients Start by bringing all the ingredients together. It saves time and ensures a smooth, streamlined mixing process. You’ll need a medium bowl and a whisk for this dressing. Step 2: Combine the Base Ingredients In your bowl, mix the mayonnaise, apple cider vinegar, and honey. These are the foundation of your dressing, and whisking them together will create a smooth mixture that’s the perfect base for flavor! Step 3: Add the Flavor Boosters Toss in the poppy seeds, salt, black pepper, and finely chopped onion. Each of these components adds character and freshness, making your Poppy Seed Dressing truly pop! Step 4: Whisk Away With your whisk, blend everything together until smooth. This is where the magic happens, and you’ll start to notice the textures coming together beautifully as your dressing thickens. Step 5: Taste and Adjust Now comes my favorite part—taste testing! As you whisk, give your dressing a little taste. If you feel like it needs more sweetness, add a bit more honey. Too tangy? A touch more mayonnaise can dial it back. Adjust to your heart’s content. Step 6: Serve and Enjoy Drizzle this incredible Poppy Seed Dressing over your favorite salad, or use it as a delightful dip for fresh veggies. It’s the perfect finishing touch for a beautiful meal or a casual lunch. Feel free to store leftovers in the fridge for later indulgence. In less than 10 minutes, you’ve created a gorgeous Poppy Seed Dressing that will transform any meal into a vibrant experience. Enjoy the compliments that will surely roll in from your family and friends—after all, who wouldn’t want to bask in the glory of a homemade dressing that’s as easy as it is delicious? Happy cooking! Perfecting Poppy Seed Dressing Cooking Process To achieve the best results when making Poppy Seed Dressing, combine your ingredients in a bowl, starting with mayonnaise, then whisk in apple cider vinegar, honey, poppy seeds, salt, black pepper, and onion for a creamy, flavorful blend. Add Your Touch to Poppy Seed Dressing Feel free to customize your Poppy Seed Dressing by swapping the mayonnaise for Greek yogurt for a lighter version, adding garlic powder for a flavor punch, or tossing in some chopped fresh herbs for extra freshness. Storing & Reheating Poppy Seed Dressing Store your Poppy Seed Dressing in an airtight container in the fridge for up to a week. There’s no need to reheat, just give it a good shake or stir before serving to refresh its creamy texture. The first time I made Poppy Seed Dressing, my friends couldn’t get enough. They kept asking for the recipe, and I felt like a culinary rock star! It’s magical how a simple dressing can turn a meal into a memorable feast. FAQs About Poppy Seed Dressing What is Poppy Seed Dressing? Poppy Seed Dressing is a creamy, tangy dressing that combines mayonnaise with apple cider vinegar, honey, and poppy seeds, creating a flavor-packed accompaniment for salads, fruits, and grilled meats. This versatile dressing is not only delicious but also adds a lovely crunch and visual appeal thanks to the poppy seeds. It’s an excellent way to elevate your homemade dishes and can be whipped up in just 10 minutes, making it perfect for quick meals. How do you make Poppy Seed Dressing? Making Poppy Seed Dressing is as simple as combining a few pantry staples. Start by whisking together mayonnaise, apple cider vinegar, honey, poppy seeds, salt, black pepper, and finely chopped onion in a bowl. The result is a smooth, creamy mixture that perfectly balances sweetness and tanginess. Once you master this basic recipe, feel free to customize it with additional flavors, like fresh herbs or spices, to suit your taste. Can I use Poppy Seed Dressing on fruits? Absolutely! Poppy Seed Dressing pairs wonderfully with fresh fruits. Its creamy texture and sweet flavor complement fruit salads beautifully, specifically with strawberries, melons, and citrus fruits. Drizzling this dressing over a vibrant fruit salad will not only enhance the flavors but also add an eye-catching touch to your dish.
Quick and Easy Low Carb Snacks on the Go in Just 10 Minutes
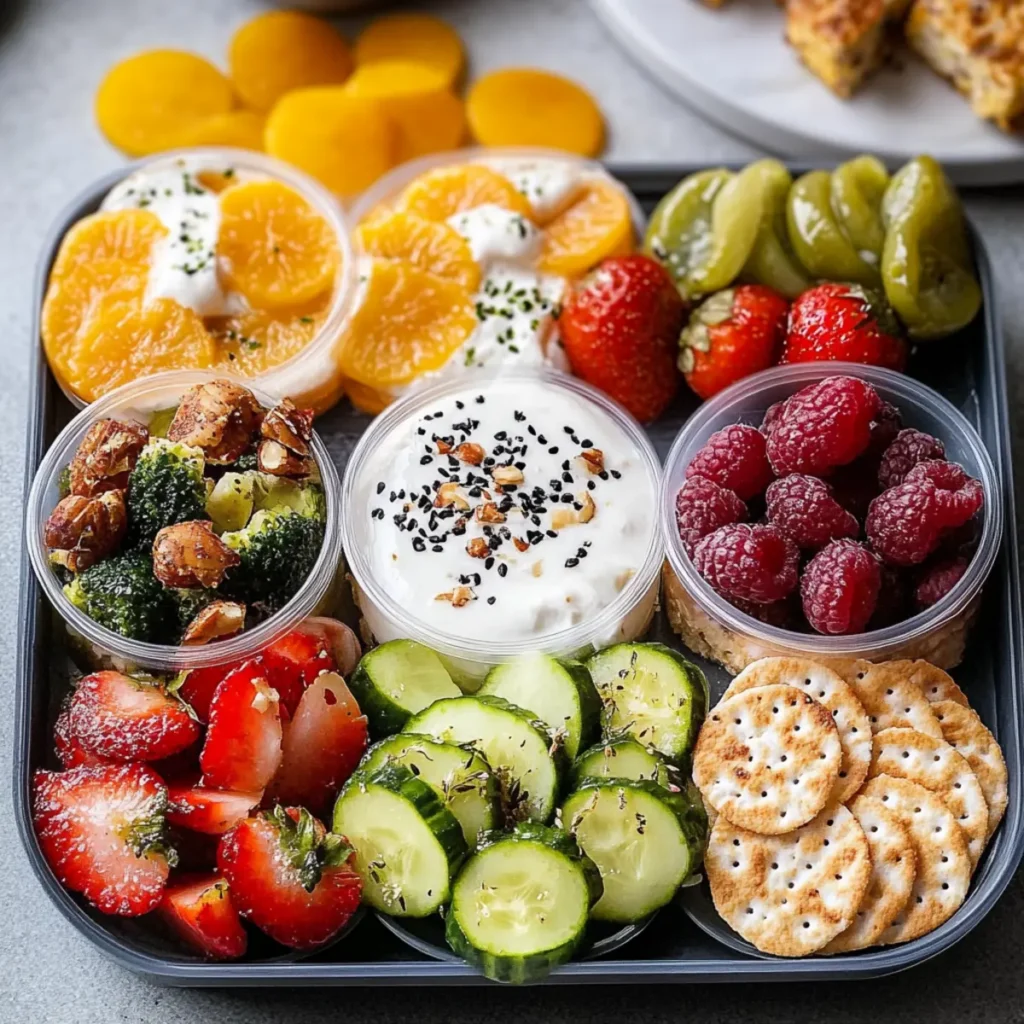
Indulging in delicious snacks that are also low in carbs can sometimes feel like navigating a maze. With Low Carb Snacks on the Go, you’re about to discover simple yet scrumptious bites that don’t leave you counting clouds instead of carbs. Picture enjoying easy-to-make treats that burst with flavor, making your taste buds cheer, while worry about your waistline takes a backseat. Whether you’re racing to work, relaxing at home, or tackling the playground with your kids, these snacks are perfect for any occasion. It’s like having your cake and eating it too, minus the hefty sugar and carb overload. Let’s dig into the delightful details of this snack recipe that will spark joy and keep you satisfied throughout the day. Ingredients for Low Carb Snacks on the Go Here’s what you’ll need to make this delicious Low Carb Snacks on the Go: 1 cup shredded cheese – Choose your favorite cheese; cheddar or mozzarella both work great for melting goodness. 1 cup mixed nuts – A blend of almonds, walnuts, and pecans adds a crunchy contrast and healthy fats. 1 cup celery sticks – Crisp and refreshing, perfect for dipping in your favorite spreads. 1 cup cucumber sticks – Light and hydrating, they’re a delightful addition packed with nutrients. 1 cup hummus – Creamy and flavorful, it’s a fantastic dip that complements the veggies beautifully. 1 cup guacamole – Rich and creamy, guacamole brings that touch of indulgence while retaining the low-carb ethos. How to Make Low Carb Snacks on the Go Follow these simple steps to prepare this delicious Low Carb Snacks on the Go: Step 1: Gather Your Ingredients Start by collecting all the ingredients mentioned above. Having everything within reach makes the prep process quick and easy—no need for frantic searches in the fridge! Step 2: Prepare Your Plates Grab some delightful serving dishes. Arrange the shredded cheese, mixed nuts, and fresh veggie sticks like you’re a gourmet chef ready for a cooking show. Your guests (or yourself!) will be impressed by the visual feast. Step 3: Serve Up the Dips Spoon the hummus and guacamole into small bowls and position them alongside your hearty display of goodies. They’re not just dips; they’re flavor-packed experiences waiting to happen! Step 4: Enjoy! Grab a celery stick, dip it into the hummus, and take a bite. Revel in the crunch of the veggies paired with the creamy dip. Swap out the celery for cucumber sticks, or take a handful of mixed nuts. It’s all about what tickles your fancy! Step 5: Optional Flavor Enhancements Feel free to sprinkle some chili flakes on the hummus for a spicy kick or add a dash of lime juice to the guacamole for extra zing. Customize to your taste preferences—your snacks, your rules! Step 6: Store the Leftovers If, by some miracle, there are leftovers, store them in airtight containers. The dips can last a couple of days in the fridge, keeping your snacking game strong for a second round. Snack time isn’t just a few bites to keep you going; it should be an experience, a moment of joy in your busy day. With Low Carb Snacks on the Go, you can indulge without the guilt. Imagine yourself at a summer picnic, enjoying these bright, colorful snacks, sharing laughter, and basking in the sunlight. Requesting seconds has never been so delightful when your waistline is smiling too! So there you have it! Quick, simple, and oh-so-delicious low-carb snacks that fit perfectly into your fast-paced lifestyle. With each bite you take, you’re portraying the adage: snacks can be healthy, too! Bon appétit! Perfecting Low Carb Snacks on the Go Cooking Process Start by gathering all ingredients at once, allowing the shredded cheese and nuts some time to shine while you prepare the celery and cucumber sticks. This sequence ensures everything is ready when it’s time to dive into your snack masterpiece. Add Your Touch to Low Carb Snacks on the Go Feel free to mix in different cheeses for flair, swap in your favorite nuts, or add chili flakes to your hummus for a kick. Customize your platter to match your taste and make it truly your own. Storing & Reheating Low Carb Snacks on the Go Store the leftovers in airtight containers in the fridge for up to three days. For best results, enjoy them chilled, but feel free to pop them in the microwave briefly if you prefer a warm snack. Sharing this snack spread at my last gathering brought raves, especially when my uncle asked for the recipe—who knew I’d turn him into a self-proclaimed cheese and nut expert? FAQs About Low Carb Snacks on the Go What is Low Carb Snacks on the Go? Low Carb Snacks on the Go refers to easy-to-prepare snacks that are low in carbohydrates, making them perfect for anyone following a low-carb diet or looking to manage their weight. These snacks typically include high-protein ingredients like cheese and nuts, along with fresh veggies, providing a balanced option that can satisfy hunger without spiking blood sugar levels. The beauty of these snacks lies in their convenience, allowing you to enjoy them anywhere, be it at home or on the move. How can I customize my Low Carb Snacks on the Go? Customizing your Low Carb Snacks on the Go is incredibly fun and simple! You can mix and match your favorite nuts, try different cheese varieties, or add tasty dips like guacamole or salsa. For those who like a spicy kick, adding chili flakes to your hummus is a great option. Feel free to incorporate seasonal veggies or even add a bit of fresh herb garnish to elevate your snack’s presentation. The key is to let your creativity shine! Can children enjoy Low Carb Snacks on the Go? Absolutely! Low Carb Snacks on the Go can be a nutritious and delicious option for children as well. By offering items like cheese, veggies, and dips, you provide a fun way for kids to engage
Valentine’s Day Ham and Cheese Pinwheels Easy Party Bites Recipe

The love for food is universal, but on Valentine’s Day, it takes on a whole new flavor. Imagine walking into a room filled with the delightful aroma of warm tortillas, melting cheese, and savory ham, all wrapped up in a cute little pinwheel. These VALENTINE’S DAY Ham and Cheese Pinwheels (Easy Party Bites) are not just an appetizer; they’re like a love letter to your taste buds, promising a bite of joy with every swirl. On this special occasion, why not skip the cliché hearts and chocolates in favor of something that can be shared and savored? I can still remember the laughter and delight of my friends as we gathered around, joyously unrolling these pinwheels, and I knew they’d be the stars of the party. Perfect for intimate gatherings or larger celebrations, these easy-to-make pinwheels are the ideal flirtation with flavor that will leave your guests asking for more. Ingredients for VALENTINE’S DAY Ham and Cheese Pinwheels (Easy Party Bites) Here’s what you’ll need to make this delicious VALENTINE’S DAY Ham and Cheese Pinwheels (Easy Party Bites): 4 large flour tortillas – Soft and pliable, these tortillas will serve as the perfect base, wrapping everything together. 8 oz deli ham, sliced – Choose your favorite, whether it’s smoked or honey-glazed, for an added flavor boost. 1 cup shredded cheddar cheese – Cheddar brings a creamy texture and sharpness that pairs beautifully with the ham. 1 cup fresh spinach leaves – Adding a pop of color and a hint of freshness, spinach balances the richness of the other ingredients. 8 oz cream cheese, softened – This creamy base is essential for binding it all together while adding a luxurious texture. How to Make VALENTINE’S DAY Ham and Cheese Pinwheels (Easy Party Bites) Follow these simple steps to prepare this delicious VALENTINE’S DAY Ham and Cheese Pinwheels (Easy Party Bites): Step 1: Gather Your Ingredients Start by laying out all your ingredients on a clean countertop. Make sure the cream cheese is at room temperature to make it easier to spread. Take a moment to feel like a culinary artist surrounded by your masterpiece in the making! Step 2: Spread the Cream Cheese Grab a knife or a spatula and generously spread the softened cream cheese over each tortilla. Make sure to cover every inch for a creamy goodness that will complement your other ingredients. Step 3: Layer on the Goodness Now it’s time to sprinkle the deli ham over the cream cheese. Be generous! Follow with an even layer of shredded cheddar cheese and the fresh spinach leaves. Look at that beautiful rainbow of colors; it’s like art in the kitchen! Step 4: Roll Them Up Tight Starting at one end, carefully roll each tortilla tightly from one side to the other. Make sure not to squish the delicious fillings inside, and roll it nice and snug for perfect pinwheel shape. Step 5: Slice into Pinwheels Using a sharp knife, slice each rolled tortilla into 1-inch thick pinwheel shapes. Give each piece a little twist to show off the colorful layers inside – it’s all about presentation! Step 6: Arrange and Serve Arrange your beautifully sliced pinwheels on a serving platter. You can even garnish with extra spinach leaves or some cherry tomatoes for a vibrant touch. Enjoy right away or chill them in the fridge for a bit for extra party prep! These VALENTINE’S DAY Ham and Cheese Pinwheels (Easy Party Bites) are sure to be a runaway hit at your next gathering or cozy night in. They encapsulate the flavors of love while being easy to make and fun to share! Whether you’re celebrating with a significant other, friends, or the family, you’ll bring smiles and a chorus of “Mmm” with every bite. Don’t be surprised if you find people reaching for three or four more. Enjoy this love-filled culinary adventure! Perfecting VALENTINE’S DAY Ham and Cheese Pinwheels (Easy Party Bites) Cooking Process Start by bringing cream cheese to room temperature to ensure smooth spreading. Spread a generous layer on each tortilla and stack your ingredients in the right order to achieve the perfect roll. Add Your Touch to VALENTINE’S DAY Ham and Cheese Pinwheels (Easy Party Bites) Feel free to swap the deli ham for turkey or roast beef for a different flavor. Add a sprinkle of your favorite herbs or toss in some sliced bell peppers for extra crunch. Storing & Reheating VALENTINE’S DAY Ham and Cheese Pinwheels (Easy Party Bites) To store, cover pinwheels tightly in plastic wrap and refrigerate for up to three days. When ready to enjoy, simply slice and serve cold or slightly warm in the microwave. During a friend’s birthday party, I whipped up these pinwheels, and they disappeared in minutes! Everyone raved about how delicious and easy they were to make, making it a real crowd-pleaser. FAQs About VALENTINE’S DAY Ham and Cheese Pinwheels (Easy Party Bites) What is VALENTINE’S DAY Ham and Cheese Pinwheels (Easy Party Bites)? VALENTINE’S DAY Ham and Cheese Pinwheels (Easy Party Bites) are delightful snacks that combine deli ham, cream cheese, shredded cheddar cheese, and fresh spinach, all wrapped in a flour tortilla. This recipe is quick and easy, making it perfect for gatherings or cozy dinners. Each pinwheel is colorful and visually appealing, making them a hit at any party, especially on Valentine’s Day. They can be enjoyed cold or warmed, and their flavor can be customized by adding different fillings or toppings. How can I customize my VALENTINE’S DAY Ham and Cheese Pinwheels (Easy Party Bites)? Customization is key in the wonderful world of VALENTINE’S DAY Ham and Cheese Pinwheels (Easy Party Bites). You can swap out the ham for turkey or roast beef, add diced bell peppers for extra crunch, or incorporate your favorite herbs for added flavor. Want a kick? Try adding a touch of hot sauce or swapping the cream cheese for a flavored variety. These pinwheels are incredibly versatile, so feel free to get creative based on your
Super Bowl Baked Buffalo Cauliflower Wings: Easy Crowd-Pleasing Appetizer

When it comes to game day snacking, there’s nothing quite like the crispy, spicy satisfaction of SUPER BOWL Baked Buffalo Cauliflower Wings (Crowd-Pleasing Appetizer). These beautiful bites are perfect for all those “just one more” moments while you cheer on your team. Imagine the aroma of roasted cauliflower mingling with fiery buffalo sauce wafting through your kitchen, making your friends and family promise they’ll never doubt your cooking skills again. If you’re aiming for a dish that’s not just a delight to eat but also a visual treat, then these Super Bowl baked buffalo cauliflower wings are your answer. They’re a fantastic blend of flavor and healthiness that can make any football gathering just a bit more festive. Ingredients for SUPER BOWL Baked Buffalo Cauliflower Wings (Crowd-Pleasing Appetizer) Here’s what you’ll need to make this delicious SUPER BOWL Baked Buffalo Cauliflower Wings (Crowd-Pleasing Appetizer): 1 medium head cauliflower – Choose a fresh, firm cauliflower without any soft spots for the best texture in your wings. 2 tbsp olive oil – High-quality extra virgin olive oil adds flavor and aids in achieving that perfect crispiness. 1 tsp garlic powder – This brings a wonderful garlicky aroma that complements the buffalo sauce beautifully. 1 tsp paprika – Smoky and earthy, paprika contributes to both color and taste, making these wings visually stunning and rich in flavor. ½ tsp salt – Essential for enhancing the flavors of the cauliflower and the spices. ½ tsp pepper – A little bit of black pepper gives the dish a subdued heat that balances the buffalo sauce perfectly. ½ cup buffalo sauce – Choose your favorite brand or make your own for an extra kick – just remember, the more fiery, the better! How to Make SUPER BOWL Baked Buffalo Cauliflower Wings (Crowd-Pleasing Appetizer) Follow these simple steps to prepare this delicious SUPER BOWL Baked Buffalo Cauliflower Wings (Crowd-Pleasing Appetizer): Step 1: Preheat and Prepare Preheat your oven to 450°F (232°C) and line a baking sheet with parchment paper to ensure easy cleanup later. This is vital because burnt cauliflower is never a good way to impress your guests. Step 2: Chop that Cauliflower Cut your cauliflower into bite-sized florets. Aim for uniform pieces to ensure even cooking. No one wants a wing larger than their mouth during the game! Step 3: Season to Perfection In a large bowl, mix together the olive oil, garlic powder, paprika, salt, and pepper. Then toss those lovely cauliflower florets in your seasoning cocktail until they are well coated – think of it as giving them a spa day just before their big debut in the oven. Step 4: Roast the Cauliflower Spread the seasoned cauliflower on your prepared baking sheet in a single layer. Bake for 25-30 minutes, flipping halfway through. Watch them transform from crunchy florets to golden, crispy wonders that smell like heaven. Step 5: Buffalo Transformation Remove the cauliflower from the oven and place it in a large bowl. Pour your buffalo sauce over the roasted florets and toss gently until each piece is nicely coated. Make sure every nook and cranny is covered because that’s where the magic (and flavor) happens! Step 6: Bake for Final Crunch Return the sauced cauliflower to the baking sheet and bake for another 10-15 minutes. Look for that perfect caramelization – trust us, the crunch will be worth the wait! Why not serve these SUPER BOWL Baked Buffalo Cauliflower Wings with a side of creamy ranch or blue cheese dressing for dipping? Or you might want some crunchy veggies to accompany this spicy treat. Either way, get ready for your guests to rave about these healthy, delicious, and perfectly spiced nuggets of joy. Once your friends take their first bite, the question won’t be, “What’s for dinner?” Rather, it will be, “Can we have these every week?” You Must Know About SUPER BOWL Baked Buffalo Cauliflower Wings (Crowd-Pleasing Appetizer) This showstopping SUPER BOWL Baked Buffalo Cauliflower Wings (Crowd-Pleasing Appetizer) delivers restaurant-quality results using simple ingredients you probably already have at home. The perfect balance of textures and flavors creates an unforgettable dining experience that will have everyone asking for seconds. Picture-perfect presentation with vibrant colors makes this dish absolutely Instagram-worthy and guaranteed to impress any dinner guest. Incredibly versatile recipe that works beautifully for weeknight dinners, meal prep, special occasions, or even outdoor entertaining sessions. Perfecting SUPER BOWL Baked Buffalo Cauliflower Wings (Crowd-Pleasing Appetizer) Cooking Process For the best experience, start by preheating your oven to ensure those little flavor bombs get crispy. While it heats up, chop your cauliflower, mix the seasoning, and then toss. Get your cauliflower baking first before tossing in buffalo sauce for a double crunch explosion. Add Your Touch to SUPER BOWL Baked Buffalo Cauliflower Wings (Crowd-Pleasing Appetizer) Feel free to take creative liberties! Swap out the buffalo sauce for a tangy barbecue or a honey mustard glaze. You can also experiment with different spices, like cayenne for extra heat or nutritional yeast for a cheesier flavor without the dairy! Storing & Reheating SUPER BOWL Baked Buffalo Cauliflower Wings (Crowd-Pleasing Appetizer) Store leftover cauliflower wings in an airtight container in the fridge for up to three days. Reheat in a preheated oven at 350°F (175°C) for about 10-15 minutes to restore their crispness; avoid the microwave if you want to keep that crunch alive! One unforgettable Super Bowl Sunday, I served these wings to my friends, and they vanished in minutes! Their delighted faces said it all, and I realized I had unlocked my new go-to game day snack. FAQs About SUPER BOWL Baked Buffalo Cauliflower Wings (Crowd-Pleasing Appetizer) What is SUPER BOWL Baked Buffalo Cauliflower Wings (Crowd-Pleasing Appetizer)? SUPER BOWL Baked Buffalo Cauliflower Wings (Crowd-Pleasing Appetizer) are a delicious plant-based alternative to traditional buffalo wings. Made from cauliflower florets tossed in a spicy buffalo sauce, they are baked to crispy perfection. This appetizer captures the essence of game-day snacks while catering to health-conscious eaters. They’re perfect for gatherings like the Super Bowl, providing
Deliciously Simple Caramelized Onions Recipe for Beginners
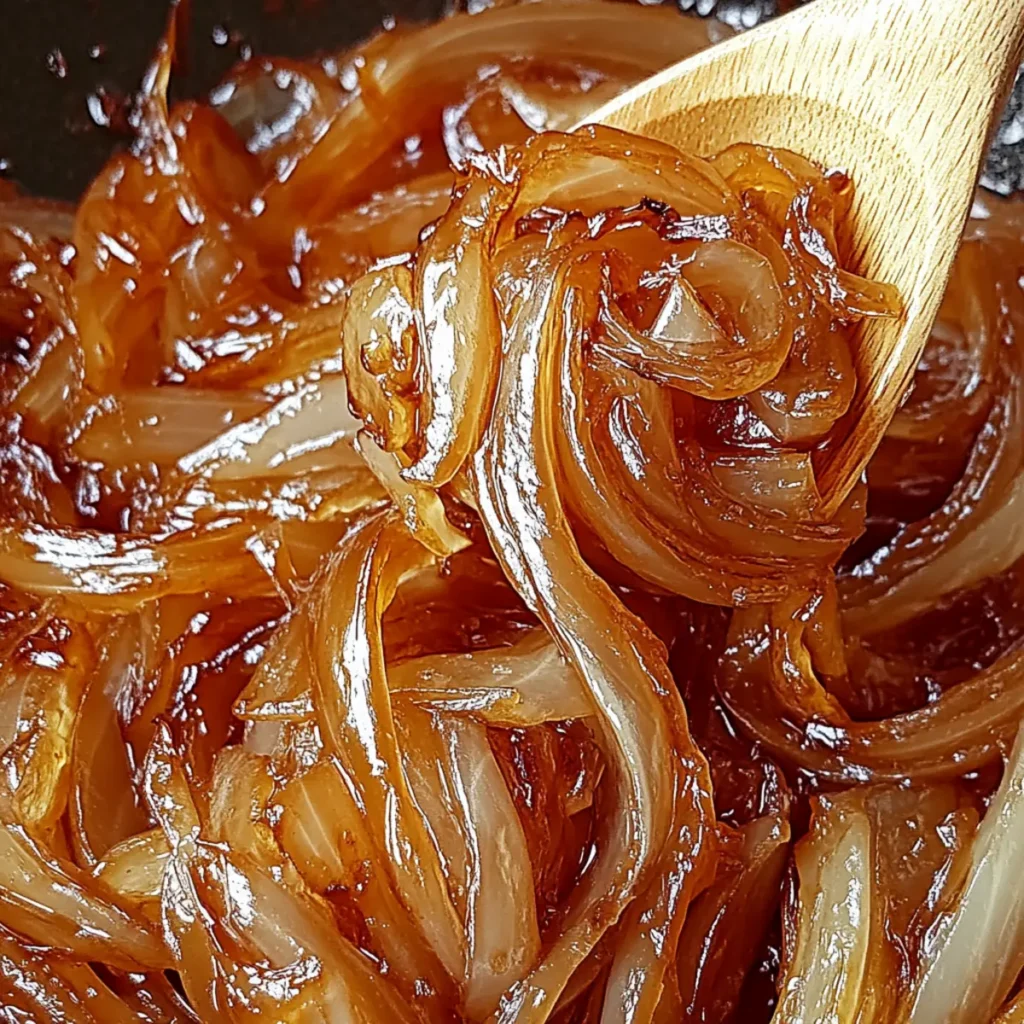
There’s something truly magical about the aroma of caramelized onions wafting through your kitchen. Picture this: those humble yellow onions slowly transforming into a sweet, golden medley, their natural sugars dancing with joy as they turn into luxuriously soft, flavorful morsels that can elevate any dish. Yes, that’s right! Caramelized onions can turn a plain meal into a culinary masterpiece. You can almost taste the harmony they bring to everything from burgers to gourmet pizzas. Now, let me take you on a trip down memory lane. I still remember the first time I tried caramelized onions at a friend’s dinner party. Those tender, sweet-salty layers wrapped around my taste buds like a warm hug. It was love at first bite! Since then, I’ve made this simple recipe countless times, each time reliving that blissful moment. Whether it’s for a cozy night in or entertaining guests, there’s never a wrong time to whip up a batch of these delicious caramelized onions. Let’s dive into the kitchen magic and discover how easy it is to create these little bites of joy. Ingredients for Caramelized Onions Here’s what you’ll need to make this delicious Caramelized Onions: 2 large yellow onions – The sweet flavor of yellow onions works best for caramelization. Look for onions that are firm and heavy for their size. 2 tbsp unsalted butter or olive oil – Butter gives a rich flavor, while olive oil keeps it lighter. Choose based on your preference or health needs. 1/2 tsp salt – This enhances the natural sweetness of onions, drawing moisture out and aiding in the caramelization process. 1 tsp sugar (optional) – Adding sugar can speed up caramelization, creating a sweeter flavor profile if you prefer it that way. How to Make Caramelized Onions Follow these simple steps to prepare this delicious Caramelized Onions: Step 1: Slice the Onions Begin by slicing the onions into thin, even pieces, about 1/8 inch thick. Uniformity is key here, as it ensures even cooking and caramelization. Step 2: Heat the Skillet In a large skillet, melt 2 tablespoons of unsalted butter or heat olive oil over medium heat. You want it hot enough that a sizzle is heard when you add the onions but not smoking; keep your attention sharp! Step 3: Add the Onions Add those lovely sliced onions to the skillet. Stir them gently with a wooden spoon to coat them in butter or oil, ensuring every piece gets that delicious flavor. Step 4: Season and Sweeten Sprinkle in the salt, which helps draw moisture from the onions, and if you’re feeling adventurous, add a teaspoon of sugar. This will enhance the sweetness and speed up the caramelization process. Step 5: Stir Occasionally Reduce the heat to medium-low and let the onions cook for about 30–40 minutes. Stir them occasionally; we want them to soften and deepen in color, transforming into that beautiful golden hue. Step 6: Enjoy or Store Once they’ve reached a luscious golden brown color and a sweet aroma fills your kitchen, remove them from the heat. Use them immediately, or place them in an airtight container. They’ll keep well in the fridge for up to five days and can be reheated for later use. Now that you’ve created your own caramelized onions, think about all the delightful ways you can use them! Toss them into pasta, layer them on a cheeseboard, mix them into creamy dips, or even top them on a perfectly grilled steak. The possibilities are truly endless. Enjoy the sweet journey that these caramelized onions take you on! Perfecting Caramelized Onions Cooking Process To create perfectly caramelized onions, start by slicing your onions uniformly for even cooking. Melt your butter or heat your oil first, then add the onions and season. Let them cook low and slow, stirring occasionally for perfect caramelization. Add Your Touch to Caramelized Onions Personalize your caramelized onions by swapping yellow onions for sweet or red onions depending on your taste preferences. Experiment with additional flavors like balsamic vinegar, garlic, or fresh herbs to elevate your dish further. Storing & Reheating Caramelized Onions To store your delicious caramelized onions, keep them in an airtight container in the fridge for up to five days. Reheat gently in a skillet over low heat, adding a splash of water or oil if they look dry. Sometimes when I serve caramelized onions, my friends rave about how they could eat them by the spoonful, which just makes me chuckle—what a compliment for something that started as a simple onion! FAQs About Caramelized Onions What are Caramelized Onions? Caramelized onions are a delicious, slow-cooked transformation of onions that turn sweet and golden brown. This process involves cooking them over low heat for an extended period, allowing their natural sugars to caramelize effectively. The result is a rich, complex flavor that enhances countless dishes, from burgers and pizzas to pastas and salads. Making caramelized onions is a fundamental cooking technique that can truly elevate your culinary creations. How long does it take to make Caramelized Onions? Creating perfect caramelized onions takes time, patience, and love—typically around 30 to 40 minutes of cooking. It’s essential to cook the onions over low to medium heat, allowing them to develop their sweet, rich flavor without burning. During this time, give them a stir every so often to ensure even cooking and avoid any sticking. What may seem like a lengthy process is well worth the wait for that deep, delicious taste. Can I store and reheat Caramelized Onions? Absolutely! You can store your caramelized onions in an airtight container in the fridge for up to five days. When reheating, it’s best to warm them gently on the stovetop over low heat, adding a splash of water or oil to prevent them from drying out. This way, you can enjoy the rich flavor again, whether it’s in a fresh dish or simply on toast. What dishes can I use Caramelized Onions in? The beauty of caramelized onions lies in their
Irresistible Beer Dip Recipe: Perfect Party Snack in 10 Minutes
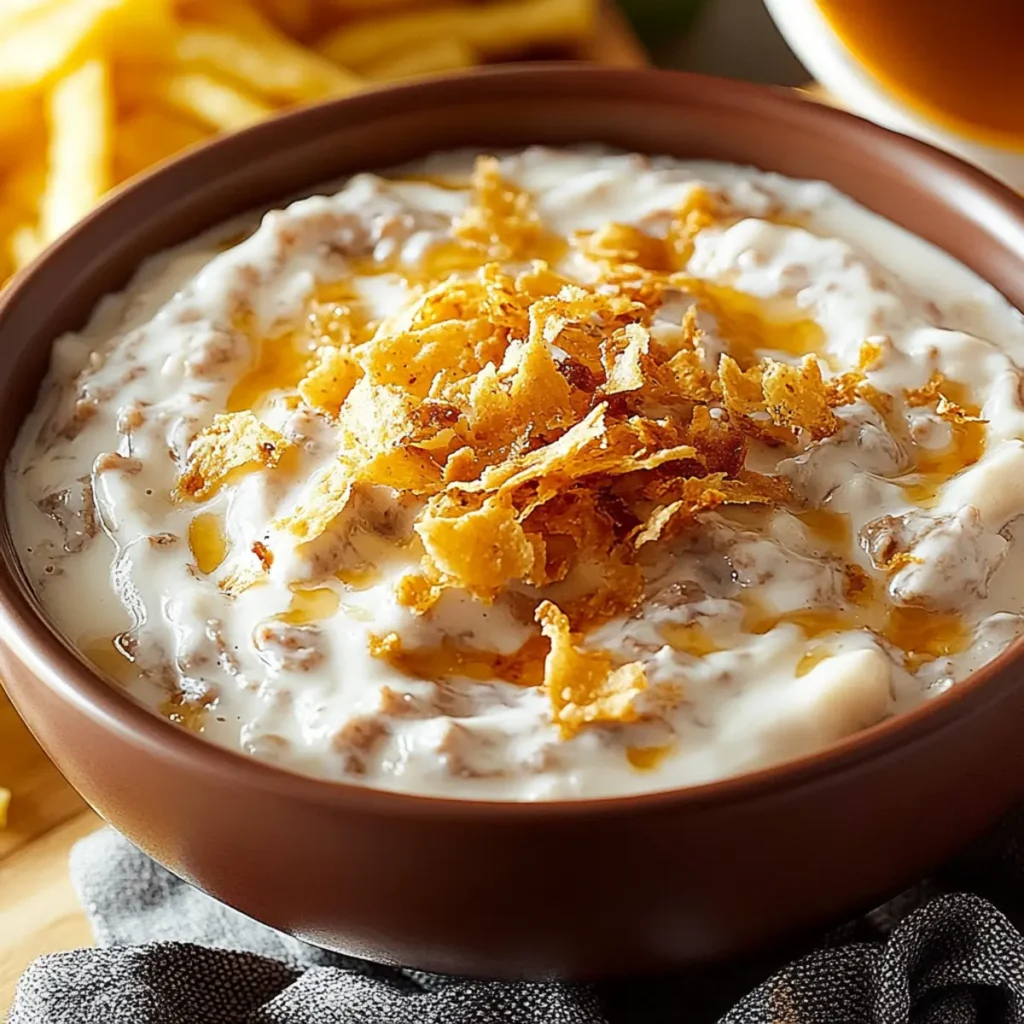
The ultimate party dip is here to make your gatherings sparkle with joy. Beer Dip is not just a snack; it’s a flavor explosion that will make you the star of any get-together. With a creamy blend of cheese and camaraderie-boosting beer, this dip is your go-to for game days, movie nights, or simply because it’s a Tuesday that needs jazzing up. As the aroma of melted cheddar mingles with the robust notes of lager, you’ll find it hard to resist diving into this creamy delight. Trust me; once you put out this Beer Dip, your friends will be gathering faster than you can say “cheers!” Grab your ingredients, and let’s make some party magic happen. Ingredients for Beer Dip Here’s what you’ll need to make this delicious Beer Dip: 8 oz soft cream cheese – Make sure it’s softened to make mixing easy and achieve that creamy consistency. 1 cup shredded sharp cheddar cheese – The sharper the cheese, the more flavor you bring to the party. You can substitute with mild cheddar if preferred. 1/2 cup lager or ale beer – Choose your favorite brew for a kick of flavor. Light lagers work well, but a hoppy IPA can add an interesting twist. 2 tbsp Dijon mustard – Adds a tangy flavor that complements the cheese beautifully. 1 tsp garlic powder – A must for adding that depth of flavor and reinforcing the savory notes. 1/4 cup green onions – These bring a fresh, zingy crunch to the dip. How to Make Beer Dip Follow these simple steps to prepare this delicious Beer Dip: Step 1: Beat the Cream Cheese In a mixing bowl, beat the softened cream cheese until smooth. You want it to be as fluffy and inviting as a cloud on a sunny day. Step 2: Stir in the Goodies Add in the shredded sharp cheddar cheese, Dijon mustard, garlic powder, and green onions. Mix well until all the ingredients are combined, creating a colorful, appetizing mixture. Step 3: Pour in the Beer Gradually pour in the lager or ale while stirring. This step is crucial for achieving that creamy consistency we all crave in a dip. Step 4: Taste the Magic Take a moment to taste your creation. Adjust seasoning if necessary—add a pinch of salt or more garlic powder if you’re feeling adventurous. Step 5: Chill its Out Transfer your whipped goodness to a serving bowl, cover it, and chill it in the fridge for at least one hour. This waiting period just builds anticipation and develops those flavors fully. Step 6: Serve and Enjoy Bring it out, pair it with your favorite chips or veggies, and watch it disappear as quickly as you can say “pass the dip!” With this stellar Beer Dip, you’ll have everyone asking for your secret recipe. This sinfully creamy dip is perfect for any occasion, and its versatility means you can enjoy it however you like! Whether it’s with crispy bread, crunchy veggies, or tortilla chips, each bite promises a party in your mouth. So grab your favorite brew, get mixing, and make your next gathering unforgettable! This showstopping Beer Dip delivers restaurant-quality results using simple ingredients you probably already have at home. The perfect balance of textures and flavors creates an unforgettable dining experience that will have everyone asking for seconds. Picture-perfect presentation with vibrant colors makes this dish absolutely Instagram-worthy and guaranteed to impress any dinner guest. Incredibly versatile recipe that works beautifully for weeknight dinners, meal prep, special occasions, or even outdoor entertaining sessions. Perfecting Beer Dip Cooking Process To create the ultimate Beer Dip, start by ensuring your cream cheese is softened to avoid lumps. Beat the cream cheese to a silky smooth texture before you mix in those delicious cheddar and beer flavors. This sequence will enhance the dip’s creaminess and flavor. Add Your Touch to Beer Dip Feel free to switch things up! Try using a different type of cheese like pepper jack for a spicy kick, or swap in a bold craft beer for extra flavor. You can also throw in some diced jalapeños if you want to crank up the heat. Storing & Reheating Beer Dip Store any leftovers in an airtight container in the fridge for up to three days. If reheating, gently warm in the microwave or on the stovetop, stirring frequently to maintain your Beer Dip’s creamy consistency. Creating this Beer Dip always brings me back to a game night with friends. Laughter filled the room as they dug in, complimenting my “fancy” culinary skills, unaware that it took me mere minutes to whip it up! FAQs About Beer Dip What is Beer Dip? Beer dip is a creamy and savory cheese spread that combines soft cream cheese, sharp cheddar, and your choice of lager or ale. This delightful appetizer is quick to make and perfect for parties, game nights, or casual gatherings. Its smooth texture and rich flavor make it an irresistible addition to any snack table. With just a handful of ingredients and minimal prep time, you can whip up a beer dip that will have everyone asking for the recipe! How do you serve Beer Dip? Servings for beer dip can vary, but it’s typically enjoyed with a variety of dippables. Classic choices include tortilla chips, pretzels, or fresh vegetable sticks. You can also spread it on crusty bread or toasted baguette slices for a gourmet touch. The creaminess of the dip pairs wonderfully with crunchy snacks, making it an ideal appetizer for any occasion. Don’t forget to serve it chilled after it has rested in the fridge for the best flavor. Can I customize Beer Dip? Absolutely! One of the best things about beer dip is its versatility. If you want to spice things up, consider adding diced jalapeños or a sprinkle of smoked paprika for extra flavor. You can also experiment with different cheeses such as pepper jack or Gouda. Want a smokier taste? Swap in a porter or stout
Super Bowl Sausage Stuffed Jalapeños Recipe for Spicy Game Day Bites
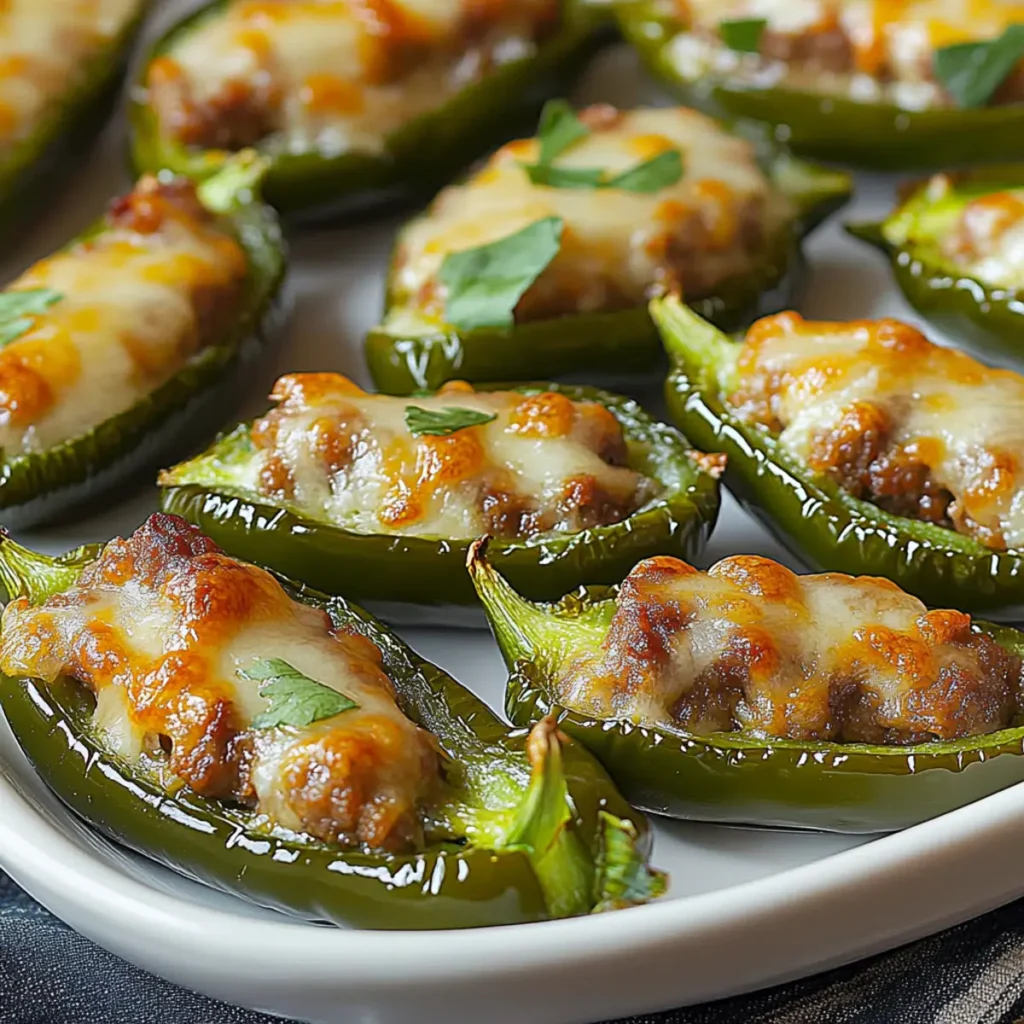
Indulge your taste buds this Super Bowl season with the ultimate party treat: SUPER BOWL Sausage Stuffed Jalapeños (Spicy Game Day Bites). Picture these delightful spicy morsels, overflowing with creamy cheeses and hearty sausage, beckoning you from a platter while the game rages on. The irresistible aroma wafting through the room will have you drooling before the first snap, making them the perfect crowd-pleaser. These vibrant jalapeños are perfect for any gathering—be it a Super Bowl watch party or a casual get-together with friends. Their delightfully spicy kick, combined with smooth creaminess, will leave you and your guests clamoring for seconds. Trust me; once you take a bite, you’ll not just be a fan of the game but also of these incredibly tasty bites. Ingredients for SUPER BOWL Sausage Stuffed Jalapeños (Spicy Game Day Bites) Here’s what you’ll need to make this delicious SUPER BOWL Sausage Stuffed Jalapeños (Spicy Game Day Bites): 10 fresh jalapeños – Look for glossy, firm peppers with a bright green color for the best flavor and heat. 1 pound ground sausage – Choose your favorite variety, whether it’s spicy, mild, or even a turkey-based option for a healthier twist. 8 oz cream cheese, softened – This adds a rich creaminess that balances the heat of the jalapeños; let it sit at room temperature for easy mixing. 1 cup shredded cheddar cheese – Opt for sharp cheddar for a more pronounced flavor that complements the spicy sausage perfectly. 1 tsp garlic powder – A great way to infuse your stuffing with robust flavor without the effort of fresh garlic chopping. How to Make SUPER BOWL Sausage Stuffed Jalapeños (Spicy Game Day Bites) Follow these simple steps to prepare this delicious SUPER BOWL Sausage Stuffed Jalapeños (Spicy Game Day Bites): Step 1: Preheat and Prepare Preheat your oven to 400°F (200°C) and spray a baking dish with nonstick cooking spray. Trust me, you do not want your delicious creations to stick to the pan. Step 2: Slice and Seed Slice each jalapeño in half lengthwise and scoop out the seeds. Be careful; the seeds can pack a punch! (Consider using gloves here unless you want to hop over to the eye doctor later.) Step 3: Cook the Sausage In a skillet over medium heat, cook the ground sausage until it’s nicely browned. Break it up as it cooks to ensure even doneness. Drain any excess grease, then mix your sausage with cream cheese, cheddar cheese, and garlic powder in a bowl. Step 4: Stuff the Jalapeños Generously fill each jalapeño half with that glorious sausage and cheese mixture. Do not hold back—those little boats are meant to be overflowing with flavor! Step 5: Bake to Perfection Arrange your stuffed jalapeños in the prepared baking dish, then pop them into the preheated oven. Bake for about 20 minutes or until they’re golden and bubbly—just time enough to grab a drink and settle in for the game. Step 6: Serve and Enjoy After baking, let them cool for a couple of minutes before serving. Plating these beautiful bites will surely win you extra points for presentation. Share them with your friends, and watch them disappear like the last slice of pizza on game day! These SUPER BOWL Sausage Stuffed Jalapeños (Spicy Game Day Bites) strike the perfect balance between spicy and creamy, ensuring every mouthful is a flavor explosion. Whether you’re a seasoned chef or someone who just loves to eat, this recipe is straightforward, entertaining, and sure to delight. So, gear up, grab a plate, and dive into an unforgettable Super Bowl party experience! This showstopping SUPER BOWL Sausage Stuffed Jalapeños (Spicy Game Day Bites) delivers restaurant-quality results using simple ingredients you probably already have at home. The perfect balance of textures and flavors creates an unforgettable dining experience that will have everyone asking for seconds. Picture-perfect presentation with vibrant colors makes this dish absolutely Instagram-worthy and guaranteed to impress any dinner guest. Incredibly versatile recipe that works beautifully for weeknight dinners, meal prep, special occasions, or even outdoor entertaining sessions. Perfecting SUPER BOWL Sausage Stuffed Jalapeños (Spicy Game Day Bites) Cooking Process Start by cooking the sausage first until browned, then mix in other ingredients. While the sausage cools slightly, prepare the jalapeños to save time. Finally, stuff and bake your peppers for perfect, spicy bites. Add Your Touch to SUPER BOWL Sausage Stuffed Jalapeños (Spicy Game Day Bites) Feel free to swap in different types of cheese, like pepper jack for an extra kick, or use ground turkey instead of sausage for a lighter option. You can also pile on your favorite toppings—think diced tomatoes or a drizzle of ranch dressing—just to make it your own. Storing & Reheating SUPER BOWL Sausage Stuffed Jalapeños (Spicy Game Day Bites) Store any leftovers in an airtight container in the fridge for up to three days. When reheating, pop them in the oven at 350°F for about ten minutes to keep them crispy and delicious. I remember the first time I made SUPER BOWL Sausage Stuffed Jalapeños for a game day party. They disappeared faster than you could say “touchdown,” and my friends were begging for the recipe. Their smiles were worth every pepper I stuffed! FAQs About SUPER BOWL Sausage Stuffed Jalapeños (Spicy Game Day Bites) What is SUPER BOWL Sausage Stuffed Jalapeños (Spicy Game Day Bites)? SUPER BOWL Sausage Stuffed Jalapeños (Spicy Game Day Bites) are a mouthwatering appetizer featuring fresh jalapeños stuffed with a rich mixture of ground sausage, cream cheese, and cheddar cheese. These delightful bites are baked until perfectly golden, offering a combination of spicy, creamy, and cheesy goodness. They are a fun and tasty treat that’s perfect for game day parties, gatherings, or anytime you crave something savory and satisfying. With their stunning presentation and explosion of flavors, these stuffed jalapeños will have everyone coming back for more. How can I customize my SUPER BOWL Sausage Stuffed Jalapeños (Spicy Game Day Bites)? Customization is key when it comes to your SUPER BOWL